Deploy
Deploying the interface
Learn how to deploy your Davia interface to make it accessible to users online.
Deploying Your App
Once you’re satisfied with your interface, deployment is simple:1. Click the Deploy button
In the Davia editor, click the Deploy button to start the deployment process.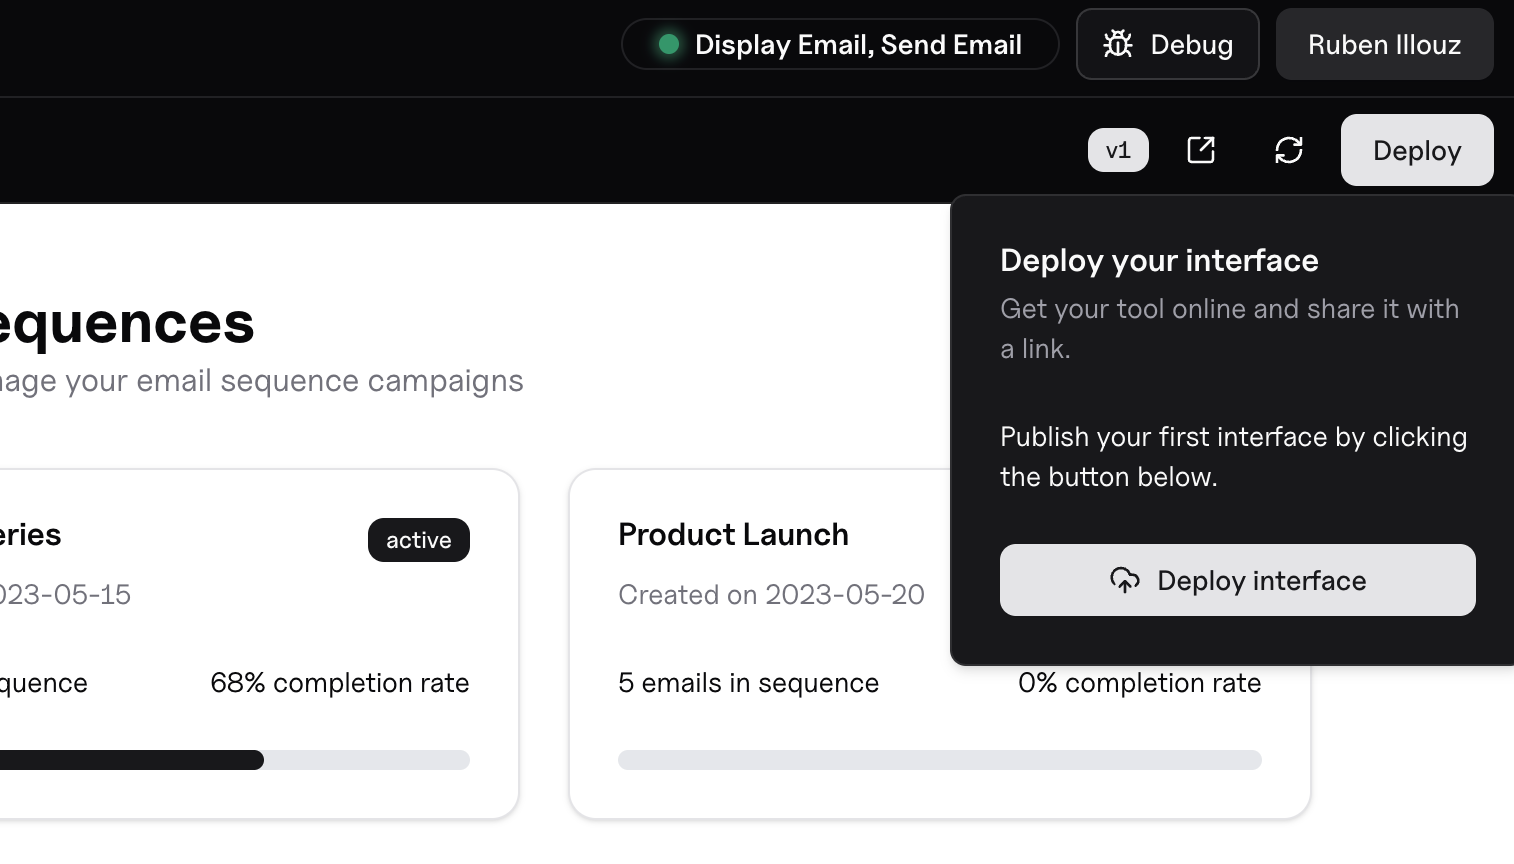
2. Confirm deployment
A confirmation screen will appear. Simply click Deploy to continue.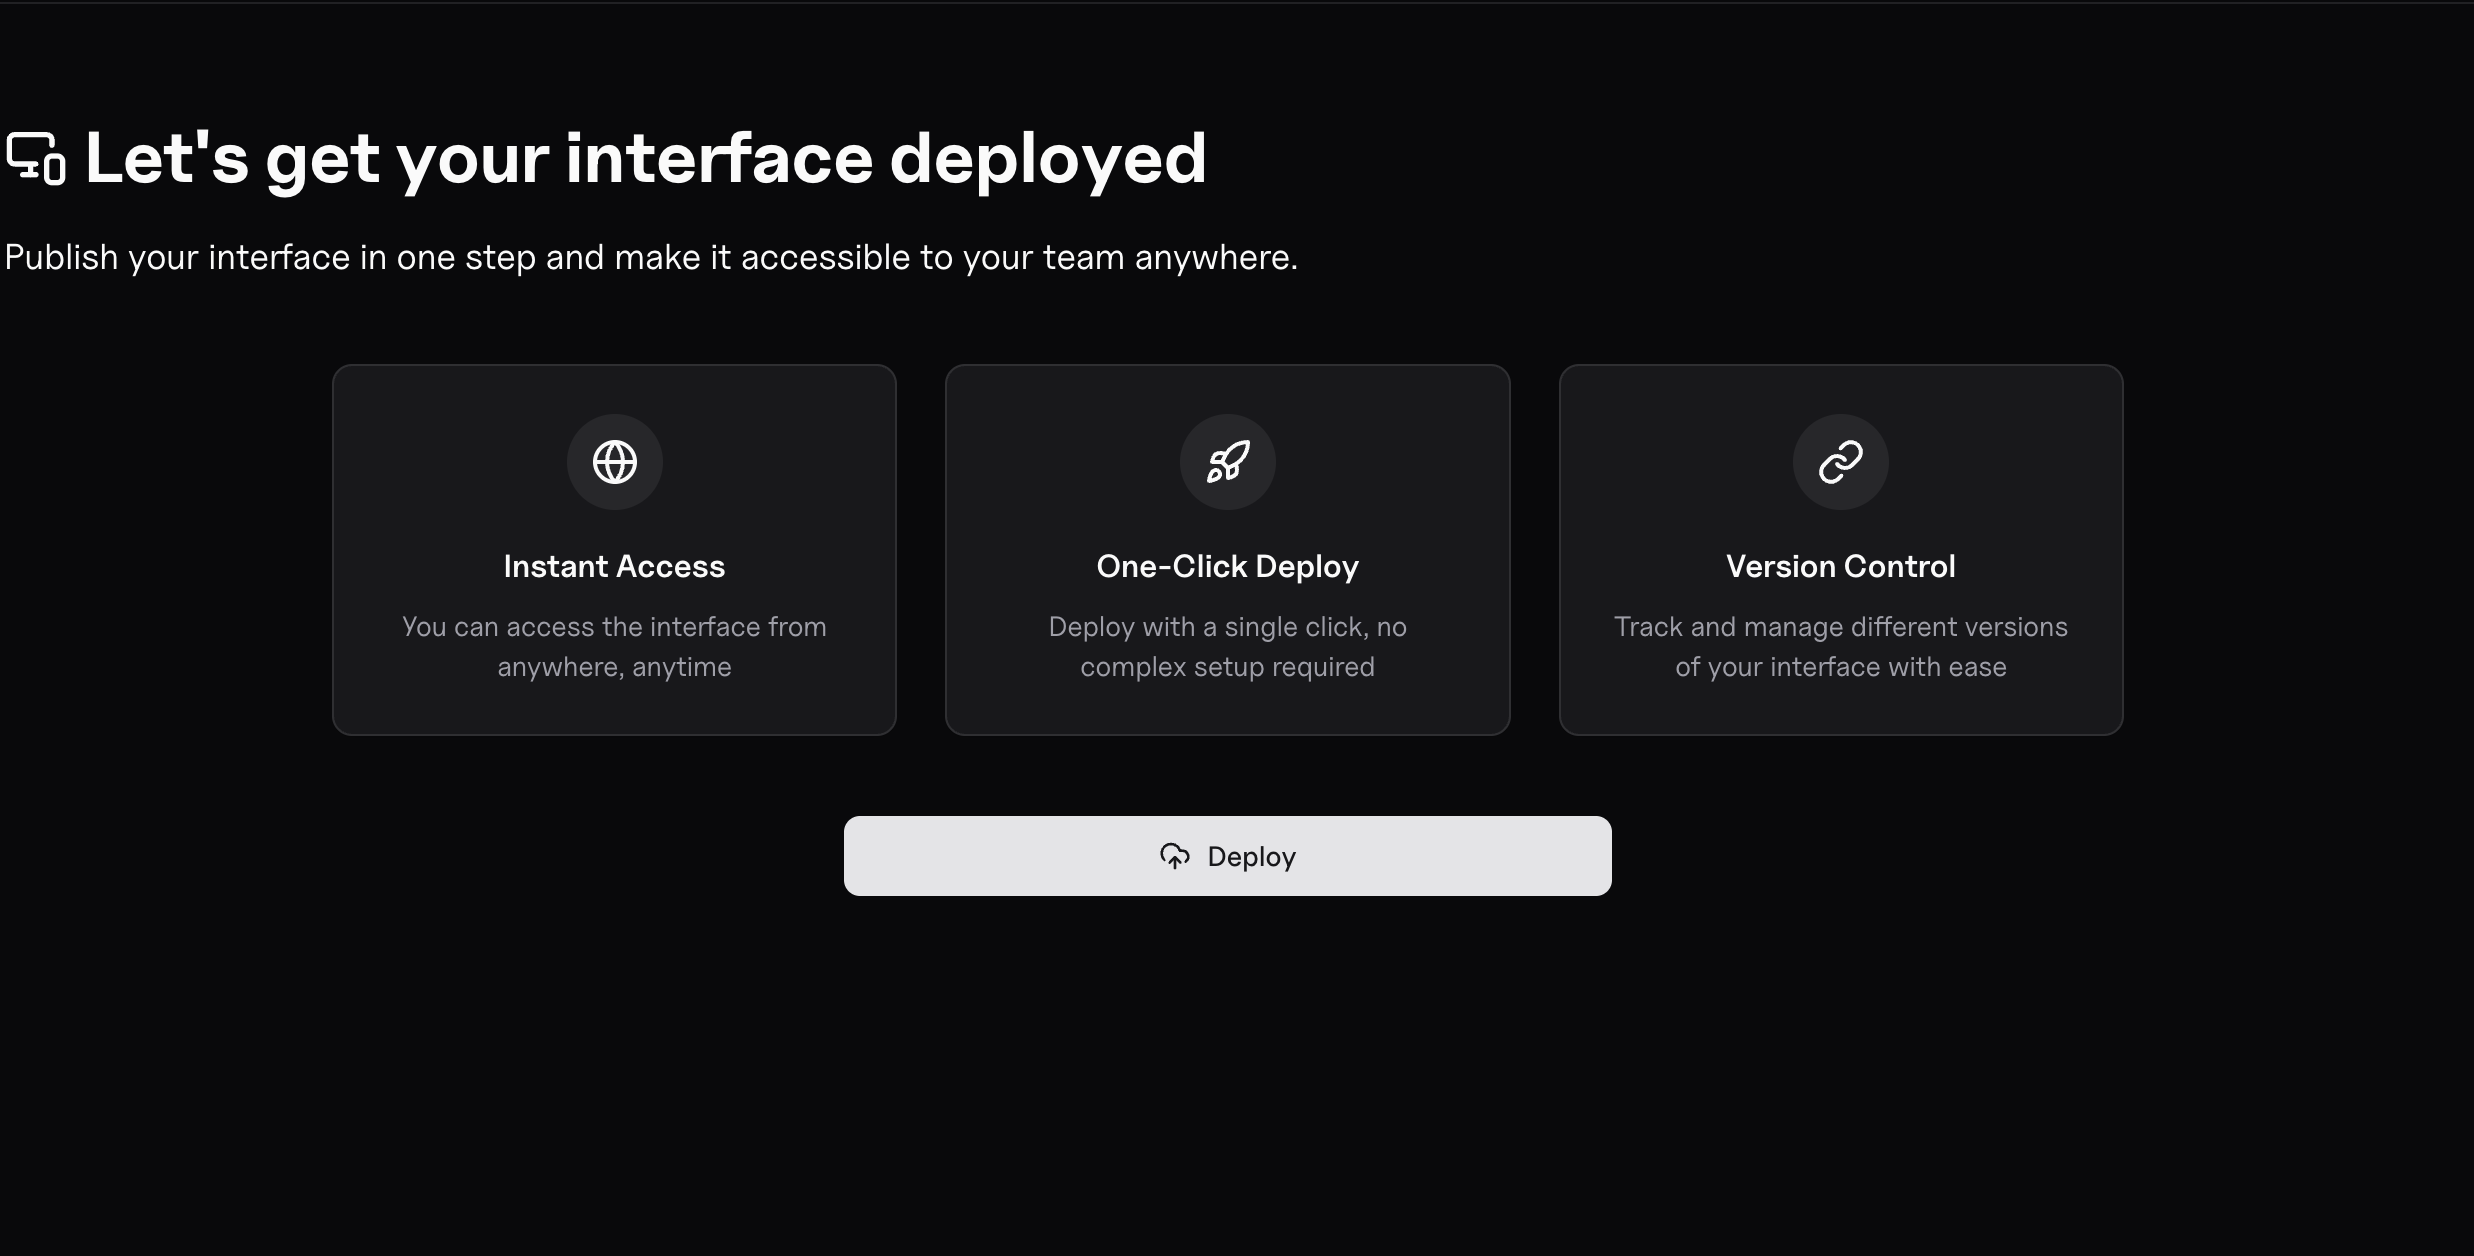
3. Your app is deployed!
Davia will automatically deploy both your frontend and backend to the cloud. When complete, you’ll receive a URL where your app is live and accessible to users.Updating Your App
If you make changes to your app later, you can easily update your deployment:- Make your changes in the Davia editor
- Click the Update Interface button
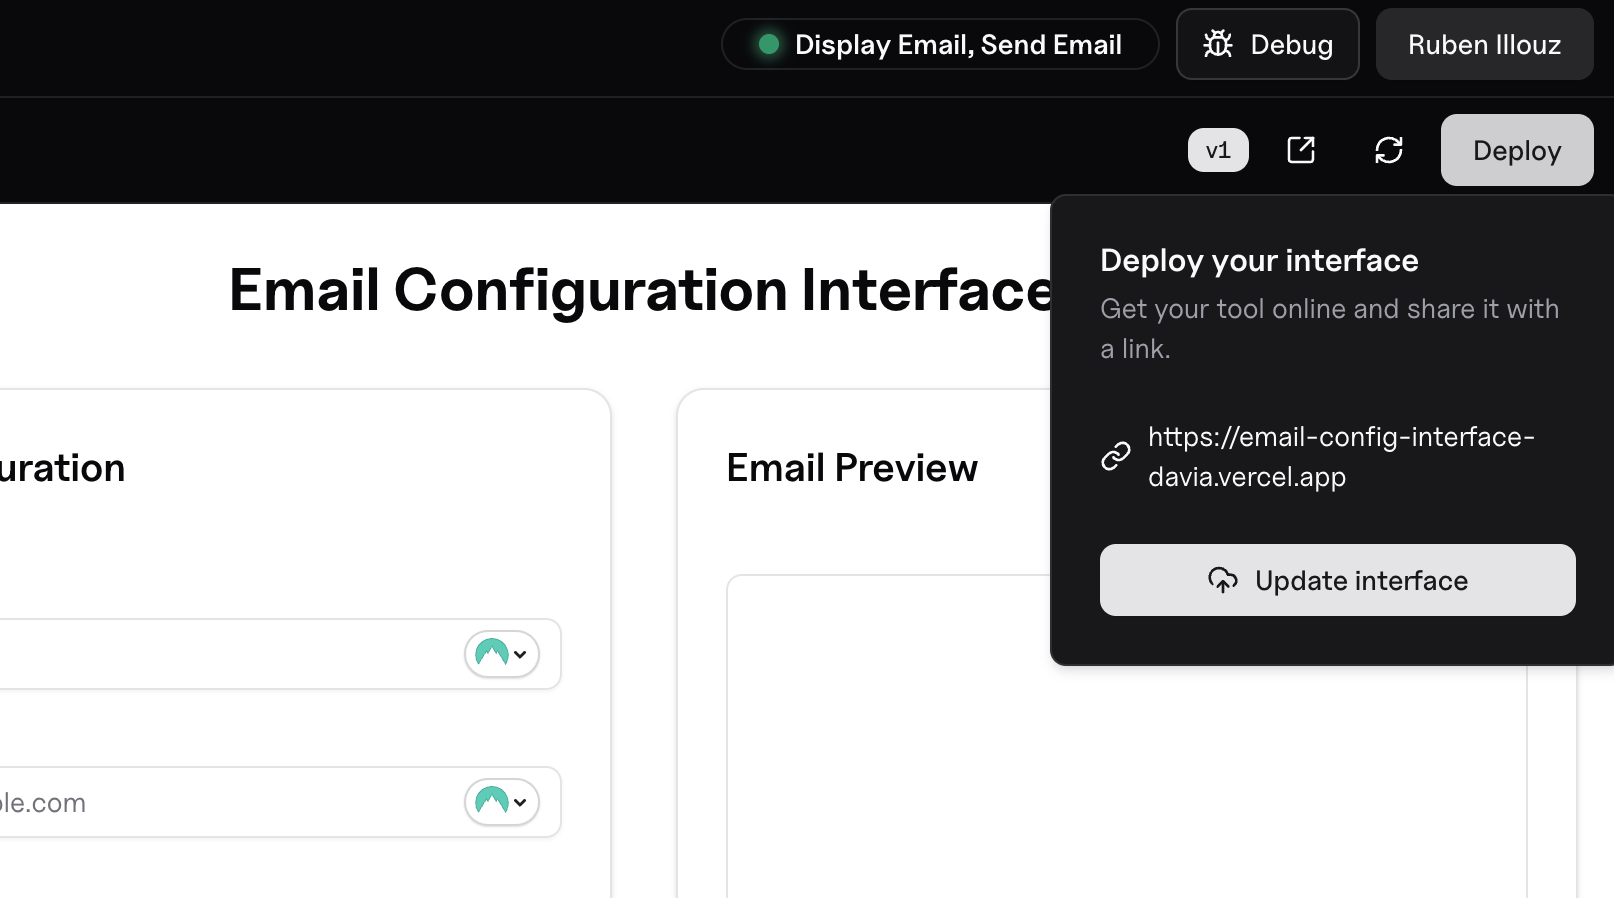 Your updated app will be redeployed automatically.